You press the button, the lights come on and the machine hums for a second. Then it stops. Not any coffee. There was only a cold, empty mug facing you. It’s not just you whose Keurig won’t brew. This is one of the most common problems with all Keurig models, from the original K-Classic to the more recent K-Supreme and K-Duo.
The good news is that most brewing problems can be fixed in less than 15 minutes without calling a repairman. Let’s start with the easy fixes and then move on to the more complicated ones, some of which are skipped by most troubleshooting tips.
Quick Checklist: Try These First
Before you take anything apart, run through this list. It solves the problem more often than you’d expect.
- Power cycle it. Unplug the machine, wait 60 seconds, plug it back in.
- Check the water reservoir. Make sure it’s filled past the minimum line and seated fully on the base.
- Reseat the K-Cup. Open and close the lid firmly — sometimes the pod isn’t piercing correctly.
- Look for a descale light. A flashing descale indicator can block brewing entirely on newer models.
- Check for a clog at the exit needle (more on this below — it’s the #1 hidden cause).
- Try a different outlet. A weak or partial power connection can cause the machine to power on but not fully cycle.
If none of these fix it, one of the causes below almost certainly will.
Cause 1: Clogged Exit Needle
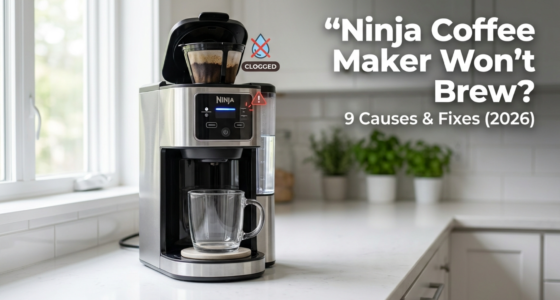
your Keurig stops making for any reason, this is the most likely cause, but most general troubleshooting guides skip over it. Over time, dried coffee grounds can get stuck in the exit needle, which is the small pin that pokes a hole in the top of your K-Cup. This stops water from flowing into your cup even though the machine is still pumping normally.
How to fix it:
- Turn off and unplug the machine.
- Open the K-Cup holder and remove the pod.
- Lift out the funnel/holder assembly (on most models this pulls straight up).
- Using a straightened paperclip, gently insert it into both the top and bottom needles and move it in a small circular motion to clear debris.
- Rinse the holder under warm water and reassemble.
- Run a water-only brew cycle (no pod) to flush it out.
Model note: On K-Duo and K-Supreme models, the needle assembly is part of a removable “MultiStream” pod holder — check your model’s needle-cleaning tool if one came in the box.
Cause 2: Scale Buildup Inside the Machine
hard water deposits minerals (scale) inside the tubing inside the unit.
This makes it hard for water to flow, which is a major reason why brews are weak, take a long time, or don’t work at all.
how to fix it:
Usually, you can find the built-in descale cycle under Settings > Descale and run it.
Fill the reservoir with equal parts white vinegar and water. If you don’t have a mode, run several brew cycles without a pod and throw away each one.
After that, do two or three cycles with only water to get rid of the vinegar taste.
To avoid this, descale your pipes every three months if you use them often, or every month if you have hard water. Scale buildup is slowed down a lot when filtered water is used in the tank.
Cause 3: Failure to prime the pump
Should the pump lose its prime, which is the first pressure that starts the flow of water, the machine may turn on and make noise but never actually draw water. This often happens after moving the machine, leaving it idle for a while, or when a tank runs out of water.
How to make it right:
Take out the reservoir and fill it back up fully.
Do two or three water-only brew cycles without a pod in a row. This will often get the pump firing again.
If the first run doesn’t do anything, tilt the machine forward and back a little to help get rid of any trapped air, then try again.
Reason 4: An air lock in the water line
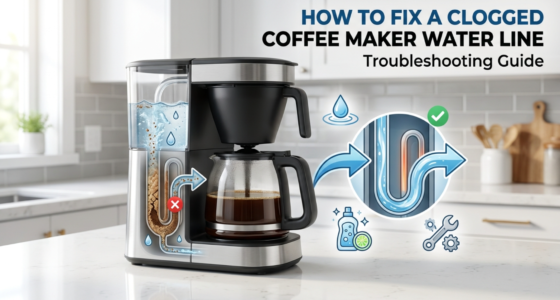
Like a failed priming, an air pocket stuck in the inner tubing can stop all water from getting to the pump, even if the reservoir is full.
How to make it right:
Take out the water tank and look for obvious debris in the bottom intake valve.
Look into the water intake on the machine base with the tank taken off. Lightly press the valve with a clean finger or cotton swab to get rid of any air that is stuck.
Put the reservoir back in place and run a cycle with only water.
Cause 5: A broken check valve
The check valve only lets water flow in one way into the brewing chamber. Even if the pump works, water can’t move forward if it gets stuck or breaks. If your computer is more than two years old, this is a more advanced fix that you might need.
How to make it right:
Unplug the machine and take off the back panel (this depends on the type; check the manual because it’s very different for the K-Classic and K-Elite lines).
The small plastic check valve should be close to the pump assembly.
You can either soak it in vinegar to clean it or get a new valve, which costs about $8 to $15 each.
If you’re not ready for this step, it’s a good idea to compare the cost of repair to the cost of replacement (see the part below).
Cause 6: Lights that blink or show errors
Different Keurig models use different patterns of lights to show when something is wrong:
If the reservoir is full and the “Add Water” light is solid, it’s likely that the reservoir isn’t sitting right or that the water-level monitor needs to be cleaned.
For some reason, the machine needs to go through a full descale run before it can brew again, even if scale isn’t the real problem.
If all of the buttons blink at the same time, it usually means the machine needs to be hard reset, which means unplugging it for more than 60 seconds.
Cause 7: The K-cup isn’t sitting right.
If the top needle doesn’t go through the foil lid of the pod, water can’t get out. A worn or misaligned lid device is more likely to blame than a clog.
How to make it right:
Check the puncture point on the lid for damage or alignment issues that can be seen.
Try a different brand of K-Cup. Some pods from other brands have thicker foil that makes it hard for older machines to break through.
If the motor looks bent or loose, it might need a new part or maybe it’s time to think about getting a new machine.
Cause 8: The heating element is broken
If the machine properly primes, pumps, and pierces the pod but still won’t finish the brew cycle, the heating element may be broken. This is an electrical part, so look at it visually and don’t use a multimeter to test it yourself unless you know how to work with tools that are plugged into the wall.
Things that show it’s the heater:
The machine moves, but it doesn’t make any liquid or cold liquid.
Smell of burning during operation
The brewing process always stops in the middle.
This is usually not something you can fix yourself, and the math for repair vs. replacement usually points to replacement.
Cause 9: Internal tubing or seals that are worn out
If you use an older machine regularly for three years or more, the silicone tubes and seals inside can break down. This can cause leaks that lower the water pressure so much that the machine stops brewing. It’s likely this if you see water pooling under the machine and the coffee maker not making. For a full explanation, read our guide on why your coffee maker is leaking from the bottom.
Repair vs. Replace: When to Do It
It doesn’t cost much to fix a Keurig. Parts like needle cleaning tools and check valves and seals are usually less than $15. But work (your time) and how old the machine is are important:
Is the machine less than two years old? It’s almost always worth fixing. Most of these reasons take 15 to 30 minutes.
A machine that is two to four years old and has a technical problem (needle, valve, or tubing): It’s worth fixing if you know how to take things apart simply.
If a machine is more than 4 years old and has an electrical problem (heating element, control board), it’s usually cheaper to get a new one. This is especially true now that single-serve machines are more stable and use less energy.
If you’re ready to buy a new coffee maker, our guide to the Best Coffee Makers Under $200 has good choices for single-serve, drip, and combo makers.
How to Make Sure This Doesn’t Happen Again
Descale your pipes every three months (or once a month if you have hard water). This one habit stops most of the problems listed above.
As much as possible, use filtered water in the tank to keep minerals from building up.
As regular maintenance, clean the exit needle once a month, not just when something goes wrong.
Don’t let the reservoir run dry over and over again; this is what usually goes wrong with priming.
See our full coffee maker descaling and cleaning guide for a full repair schedule.
FAQ
blinking lights usually mean that there is a problem with the water level sensor, that the descale prompt hasn’t been resolved, or that the reservoir isn’t fully seated. Before you think there is a bigger problem, try reseating the tank and doing a hard reset (unplug for 5 minutes or more).
Yes, in most cases. Fixing problems with priming and small jams is easy to do yourself.
Change the whole pump, but it takes more work. Compare the cost of the parts and how comfortable you are with them to the cost of a new machine.
Every three months if you use your water normally, or once a month if your water is hard. The descale light on your Keurig is a good reminder, but don’t just rely on it. Mineral buildup often starts before the light goes off.
It happens a lot, but it doesn’t always. A machine can last much longer than 3 years if it is regularly descaled and filtered water is used.
If yours broke down early even after regular care, you might want to see if it’s still under warranty.