Vitamix Blender Blade Replacement Guide: Signs, Steps & Easy Fixes
A Vitamix blender is known for having a strong motor that lasts a long time, but even the best blades wear out over time. The blade assembly may need to be replaced if your Vitamix is making strange noises, leaving chunks behind, leaking from the bottom of the container, or having trouble blending smoothly.
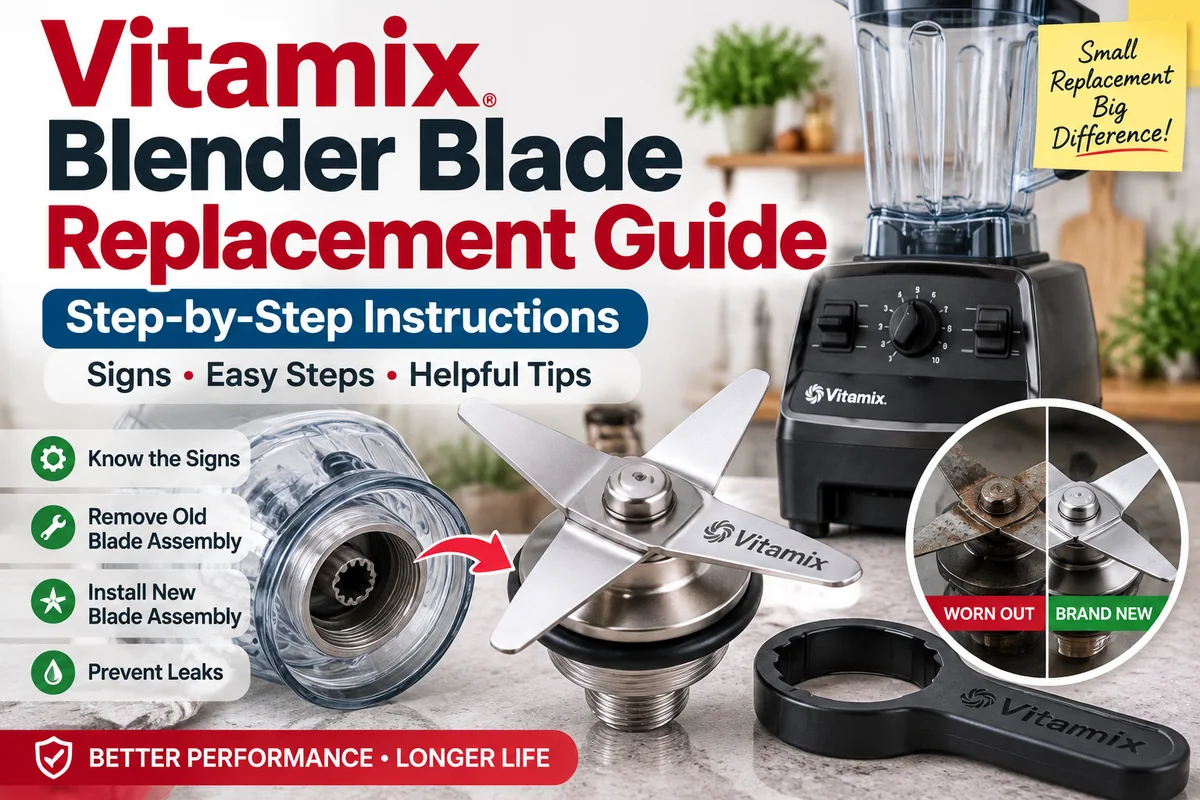
Changing the Vitamix blade part can fix the blender’s performance and make it last longer. We’ll talk about when to replace Vitamix blades, how to replace the blade assembly, common issues, and how to keep your machine in good shape in this guide.
What Is a Vitamix Blade Assembly?
The blade assembly is the spinning component located at the bottom of your Vitamix container. It includes:
- Stainless steel blades
- Blade housing
- Bearings
- Seal system
- Drive spline connection
The motor base sends power to the blades through the blade assembly. This lets your blender crush ice, make soups, smoothies, and mix thick ingredients.
Bearings, seals, and blade parts can wear out over time if they are used a lot.
Signs Your Vitamix Blade Needs Replacement
Not sure if your Vitamix blade assembly is damaged? Look for these warning signs.
1. Blender Makes Grinding or Screeching Sounds
A healthy Vitamix blade should spin smoothly. Grinding, squeaking, or rattling noises may indicate worn bearings.
2. Blender Is Not Blending Smoothly
If smoothies contain chunks or ingredients are not circulating properly, dull or damaged blades may be the reason.
3. Blade Feels Loose
Turn the blade carefully by hand (when unplugged). If you notice excessive movement or looseness, the assembly may need replacement.
4. Leakage From the Container Bottom
A damaged seal inside the blade assembly can allow liquid to leak underneath the container.
5. Blade Spins Too Easily
A worn blade assembly may rotate freely without normal resistance. Vitamix recommends replacing assemblies that show abnormal movement or wear.
How Long Do Vitamix Blender Blades Last?
The lifespan depends on:
- How often you use the blender
- Ingredients you blend
- Cleaning method
- Commercial vs home use
A home user may get several years from a blade assembly, while high-use commercial machines may require replacement sooner.
Regular inspection helps identify problems before they damage other parts.
How to Replace a Vitamix Blade Assembly (Step-by-Step)
Tools Required
You may need:
- Replacement Vitamix blade assembly
- Retainer nut wrench
- Thick towel or cloth
⚠️ Safety Tip: Vitamix blades are extremely sharp. Always protect your hands with a cloth when handling the blade assembly.
Step 1: Unplug Your Blender
Before starting:
- Turn off the blender.
- Remove the container from the motor base.
- Empty and clean the container.
Step 2: Turn the Container Upside Down
Place the container upside down on a stable surface.
Locate the retainer nut holding the blade assembly.
Step 3: Remove the Old Blade Assembly
Using the retainer nut wrench:
- Insert the wrench into the retainer nut.
- Turn counterclockwise.
- Remove the nut carefully.
- Lift out the old blade assembly using a towel.
Do not touch the blades directly.
Step 4: Install the New Blade Assembly
Follow these steps:
- Insert the new blade assembly into the container bottom.
- Align the flat sides correctly.
- Install the retainer nut.
- Hand-tighten first.
- Tighten securely with the wrench.
Avoid forcing the nut because over-tightening can damage parts.
Step 5: Test for Leaks
Before blending:
- Fill the container halfway with water.
- Leave it for several minutes.
- Check underneath for leaks.
If water leaks, check that the retainer nut is properly tightened.
Why Does a Vitamix Blade Assembly Fail?
Common causes include:
1. Normal Wear and Tear
Bearings and seals naturally wear after repeated blending.
2. Blending Hard Objects Frequently
Regularly crushing very hard ingredients can increase blade stress.
3. Incorrect Cleaning
Using harsh cleaning methods or improper products may shorten blade life.
4. Running Without Proper Container Placement
Incorrectly placing or removing the container while running can damage the drive connection.
Can You Sharpen Vitamix Blender Blades?
No. Vitamix blades are designed as part of a blade assembly rather than a typical kitchen knife.
If performance decreases, replacing the blade assembly is usually the recommended solution.
Vitamix Blade Assembly vs Replacing the Whole Container
Many users replace the entire container unnecessarily.
Replacing only the blade assembly can be a better option if:
✅ Container is not cracked
✅ Handle is fine
✅ Lid works properly
✅ Only the blade mechanism is damaged
Replace the complete container if:
❌ Container is damaged
❌ Threads are worn
❌ Bottom assembly area is cracked
How to Maintain Vitamix Blades Longer
Follow these tips:
Clean After Every Use
Wash the container properly after blending.
Avoid Foreign Objects
Do not place utensils or hard objects inside while blending.
Check Blade Condition Regularly
Inspect for:
- Cracks
- Loose movement
- Damaged seals
- Unusual sounds
Do Not Force Thick Mixtures
Add enough liquid when blending very thick recipes.
Frequently Asked Questions
There is no fixed replacement schedule. Replace them when you notice wear, noise, leakage, or reduced performance.
Yes, many blade assemblies can be replaced using the correct tools and safety precautions.
Possible causes:
Retainer nut not tight enough
Blade assembly not aligned correctly
Damaged seal
No. Blade assemblies vary by container model. Always match the replacement assembly with your Vitamix container.
Final Thoughts
If the blade part on your Vitamix is worn out, it can make noise, blend less well, and leak. Sometimes, all that needs to be done to fix a blender is to replace the blade system.
By cleaning it right and checking it often, you can make your Vitamix blade last a lot longer.







1 comment